Do you need to send a personalized message to a large group of users? Blast Messages are the way to go!
It is often necessary to send communication to a large group of people at once. This is called a Blast Message and can be accomplished in ROC-P by following the steps below:
- In your ROC-P account, navigate to Communications > Blast Messages.
- In the upper right, click +New Blast Message.
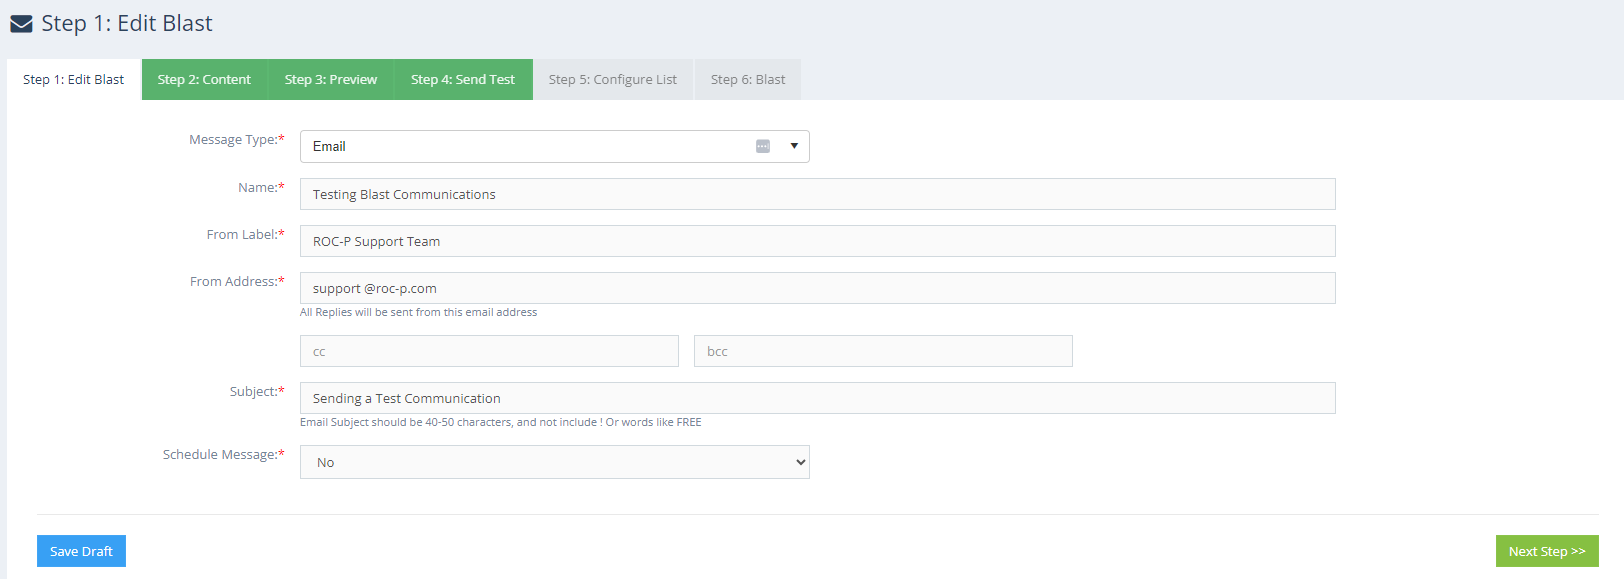
- Step 1: Edit Blast
- In the Message Type dropdown, select the type of communication to be sent. This can be an Email, SMS, or portal Notification.
- The Name of the communication is internal and for your reference only.
- Complete the remaining required fields for the type of communication selected.
- Should you choose to Schedule Message your message, select "Yes" within the dropdown.
- There are multiple Message Triggers for which you can schedule your message.

Do you want to send recurring communication? Click HERE for more information.
- Step 2: Content
- Here you will be prompted to add new content or select a template you previously created if sending an email.
- Step 3: Preview
- This step will allow you to preview the message just as the recipient would to verify your communication is configured correctly.
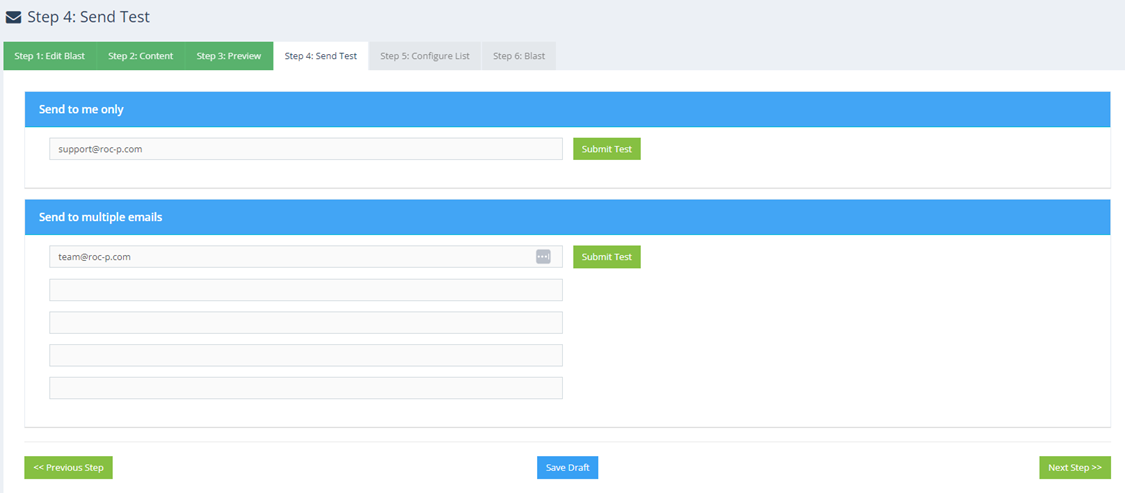
- Step 4: Send Test
- Sending a test to a teammate or colleague will help avoid grammatical errors, broken or incorrect links, and font legibility and readability.

- Step 5: Configure List
- Once you have set your parameters for who will be receiving the communication, scroll down and Generate List.
- The recipient list will populate to the right side allowing you to review before sending.
NOTE: You can only send a blast communication to ACTIVE users. To send a communicate to inactive, retired, expired, etc., use the bulk actions from the People List.
- Step 6: Blast
- A final checklist will appear to ensure all steps have been completed to send your communication successfully.
- Once the recurring communication has been sent, you can monitor and analyze results such as the Open Rate under Communications > Sent.
To share multiple files with recipients in a Blast Message, consider creating a folder in the Resources section. By directing users to this folder, they can access all the necessary files through a link on their dashboard. If you need to restrict file access to a specific group of users, you can create an attribute for added control.
If you have any questions regarding this process, please open a support ticket or reach out to support@roc-p.com and we will be happy to help!
