Updating the settings for the Verification Letter - Changing the Header, Footer, Signature, and content.
You are able to edit the header, footer, and signature images, associated fees, and Attestation & Verification statements.
From the main menu, click on:
Settings > Verifications
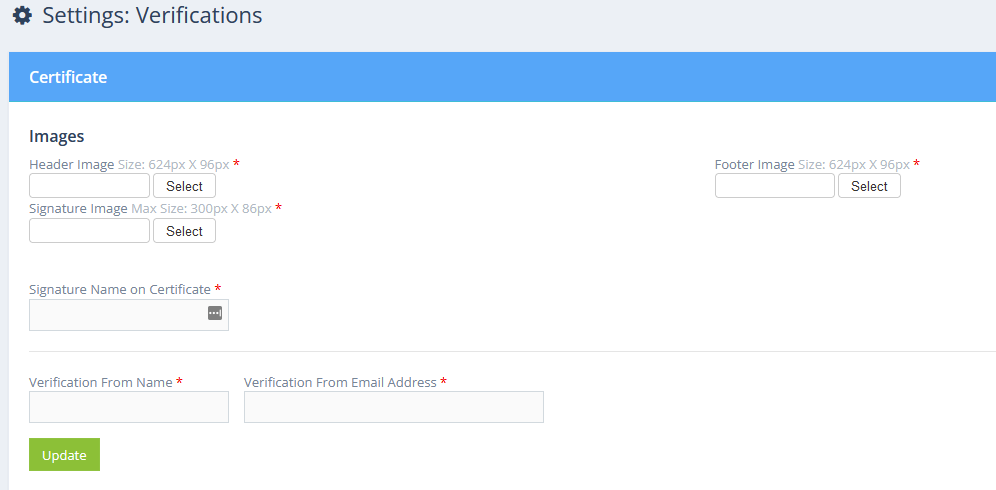
Certificate Settings

- Click the Select button under each image title to upload a saved image for the Header, Footer, and Signature images.
For each image, the dimensions must match the following:
-
-
-
- Header Image: 624 pixels wide by 96 pixels high
- Footer Image: 624 pixels wide by 96 pixels high
- Signature Image: 300 Pixels wide by 86 pixels high
-
-
Note: To replace an image, first delete the image by using the checkbox below it. You can then upload the image using the selection tool provided.
- Enter the Signature Name to appear on the certificate as well as the Verification "From" name and Verification "From" email address.
- Click Update
This will complete the certificate configuration.
Auto Verifications
The toggle switch indicated below controls the automatic sending of verification letters when they are paid. If it's turned off, verification letters will need to be manually generated and sent through ROC-P.

Fees
Required and Optional Fees can be setup using the Fees boxes:

Attestations and Statements
The next section provides fields where the following content can be entered:
Use of Information Statement
This is where the content to ask for permission to use the verification seeker's information is entered.
Verification Statement & Verification Attestation Statement
Enter the verification statement and the attestation in these provided boxes.
Company Type
Types of companies you wish to define will be obtaining verifications and can be listed here. Click Add to enter new Company Types.

If you have any additional questions on the merging of accounts, please reach out to support@roc-p.com and we will be glad to help!
